Pretty much every Dynamics AX implementation I’ve been involved in so far has required the import of stock on-hand at go-live (although as it happens, my current project doesn’t include any inventory management initially – still they’ll get around to that eventually).
I’ve used various methods to import stock on hand in the past – and typically this is done as a movement journal. You probably know that with an Inventory movement journal you can specify the off-set inventory account – whereas with an inventory adjustment journal (or a counting journal) the offset account is defined by the item’s posting profile – typically defined by the item’s Item group.
In Dynamics AX 2012 R3 we have the Data import export framework (DIXF) – and this is a walk-through of importing an inventory movement journal.
First we setup the DIXF parameters. Data import export framework > Setup > Data import /export framework parameters:

You need to have a working directory setup.
Next we’ll setup the import format as a CSV file. Data import export framework > Setup > Source data formats:

The DIXF comes with a number of standard ‘Target entities’ – we need the inventory journal. Data import export framework > Setup > Target entities:

The Target entity defines the format of the Staging table, and maps it to the actual Dynamics AX tables.
I’m working in the AX 2012 R3 CU9 Hyper-V demo image, and to get this to work, I had to cheat a bit. First I opened the AOT and made the field EntityTypeName editable
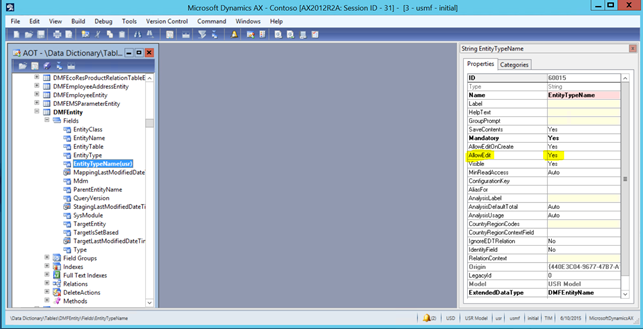
Then back on the Target entities form I set the ‘Entity’ field:

There’s no reason why you should have to do that – but no point in me missing out a step I took is there?
To use the Target entity we need a Processing group. Go to Data import export framework > Common > Processing group and create a new Processing group:

Click on the ‘Entities’ button and select the ‘Inventory journal’ Target entity and the CSV file format:

Now we can use the ‘Generate source file’ wizard to setup our input file:

I’ve selected the fields I want to import, and arranged them into a logical sequence.
‘Generate sample file’ flicks those fields into Notepad and I can save the file as a CSV file:

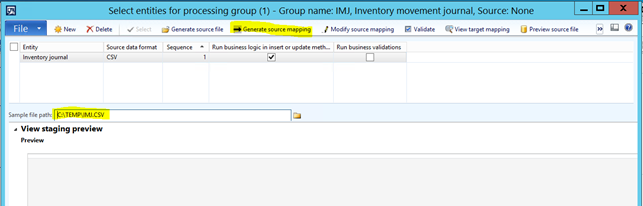
Back in the Processing groups’ ‘Select entities for processing group’ form, enter that file as your sample file, and click ‘Generate source mapping’:
You should get:

Now click ‘Validate’. I’m not sure what it does, but why wouldn’t you click a button called ‘Validate’?

Now we’re ready to open our CSV file in Excel and add some data:

And save the CSV file. Incidentally, I’m sure you’ve noticed that after you’ve save the CSV file, when you close Excel it prompts you to save your spreadsheet. I guess you only go into that endless loop once.
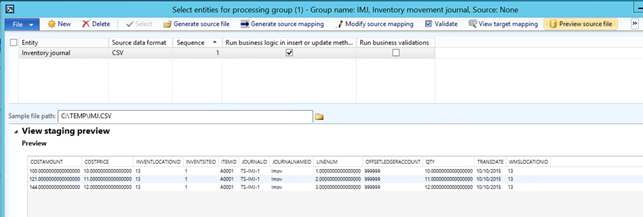
Back on the ‘Select entities for processing group’ form, it’s worth clicking ‘Preview source file’ – if that doesn’t work here, you’re not going to get much further:
So far, so good. Back to the Processing group and Click on ‘Get staging data’:

If you’re doing a lot of imports enter a Description, but it’s optional. Click OK:

That’s the default Source file we entered above – it’s the one we want to use, so just click ‘Run’ but we can at this point enter a different import file (but of course it has to have the same format). Run gives us the option to setup a batch job:

Just click Ok to run on-line and you should get:

Nearly there – back on the Processing group click ‘Copy data to target’:
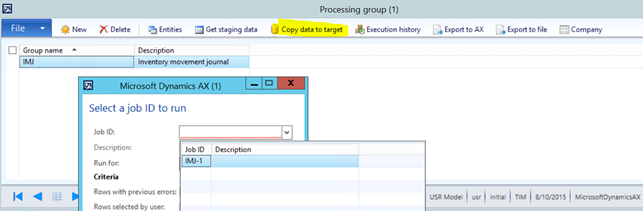
You have to enter/select your import to staging Job ID (and now you can see why it’s a good idea to enter a meaningful Description when you copy data to Staging). OK gives you another Run form:

Not so obvious, but if you have a huge data import this is where you can set it up for multi-threading by the batch job you’re about to create (by specifying a number of Bundles). We’ll press on and click Run:

No surprises – you know what to do. OK gives:

Phew, I was holding my breath. Let’s see if the journal’s there:

What, no Lines? Go the History tab and click on ‘Recalculation’:

That’s better. Inspect the lines:

Optionally, validate, and then Post.

Success!
In a previous post I talked about customising the Processing group mapping to make the import format easier for the user. A user friendly data import framework in Dynamics AX 2012-R3, and one option is to set a field for Automatic generation:

That works perfectly for the Line number, and Dynamics AX tries to do the right thing for the Journal number by looking up the number sequence – the problem is it gets carried away and generates a new Journal number for each line. Slightly amusing if you import three lines, not so funny if you import 30,000:


[…] This post is a follow-up to Import an inventory journal in AX 2012 R3 […]
LikeLike
[…] This post is a follow-up to Import an inventory journal in AX 2012 R3 […]
LikeLike
I am curious, as well, to know if you found a solution for the way AX auto generates each line as a journal
LikeLike
I think so. If you set the JournalId to “autoassign” and then add a “query criteria” (it’s a menu item on the modify source mapping page) you can choose a generic value in your source document to trigger AX into assigning one or more journal numbers.
I’m using the journal description as the trigger and it seems to be working well.
Let me know if you need more detail, would be happy to grab some screen shots.
LikeLike
Did you ever figure out a way around the Journal Number issue without assigning a value directly?
I’d ideally like to have AX assign one journal number to the whole file and it seems strange that you couldn’t just define that functionally.
Thanks!
LikeLike